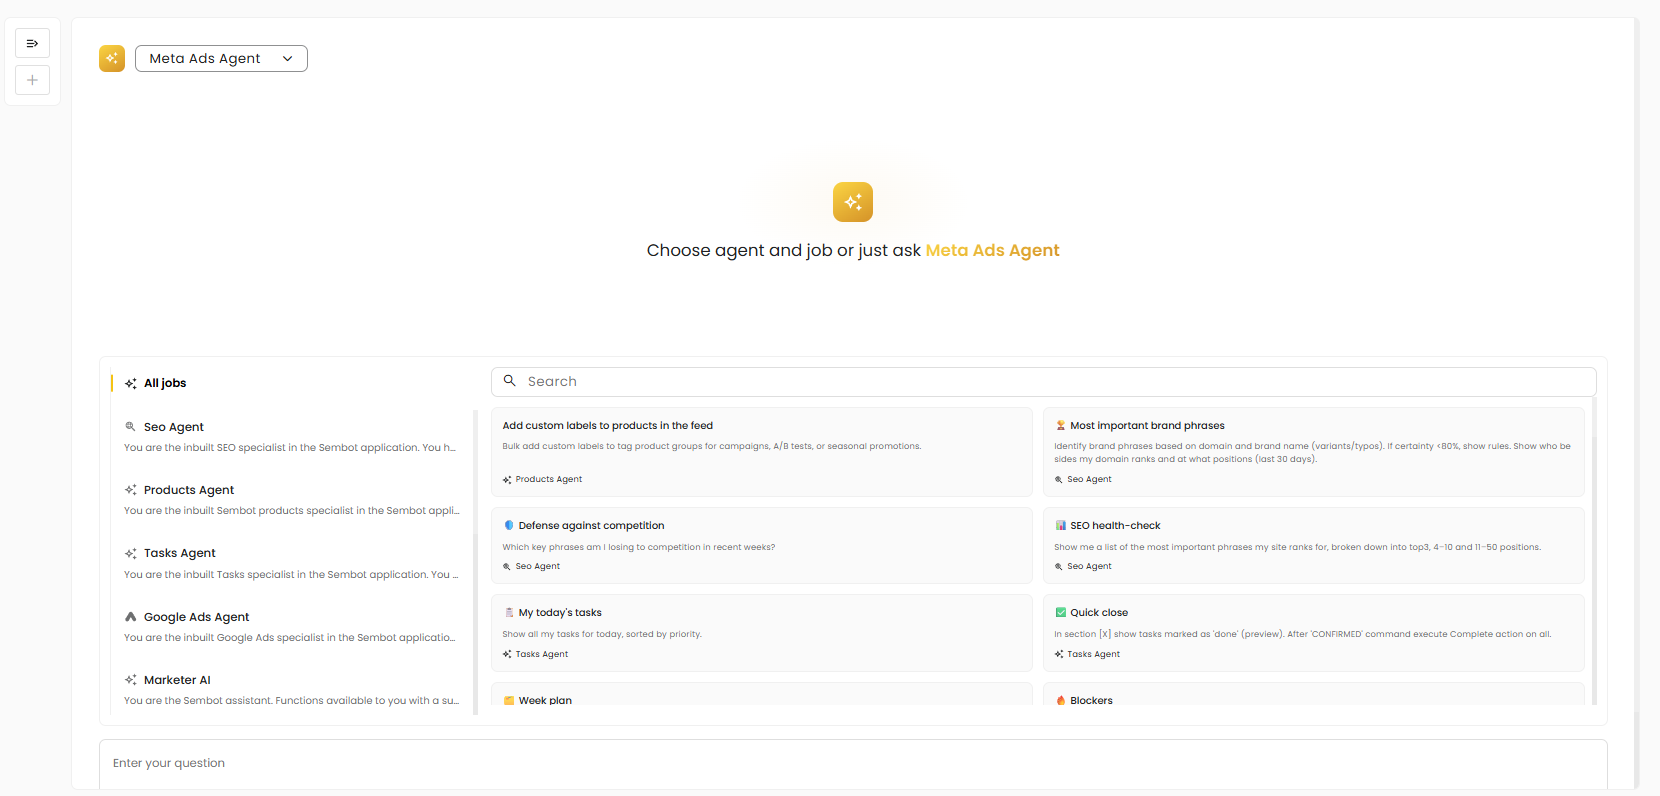
Main panel

App logo, when clicked, navigates to the Main Menu / Home.
Accounts & Projects list - shows all accounts and projects the user has access to.
Project search.
Task search.
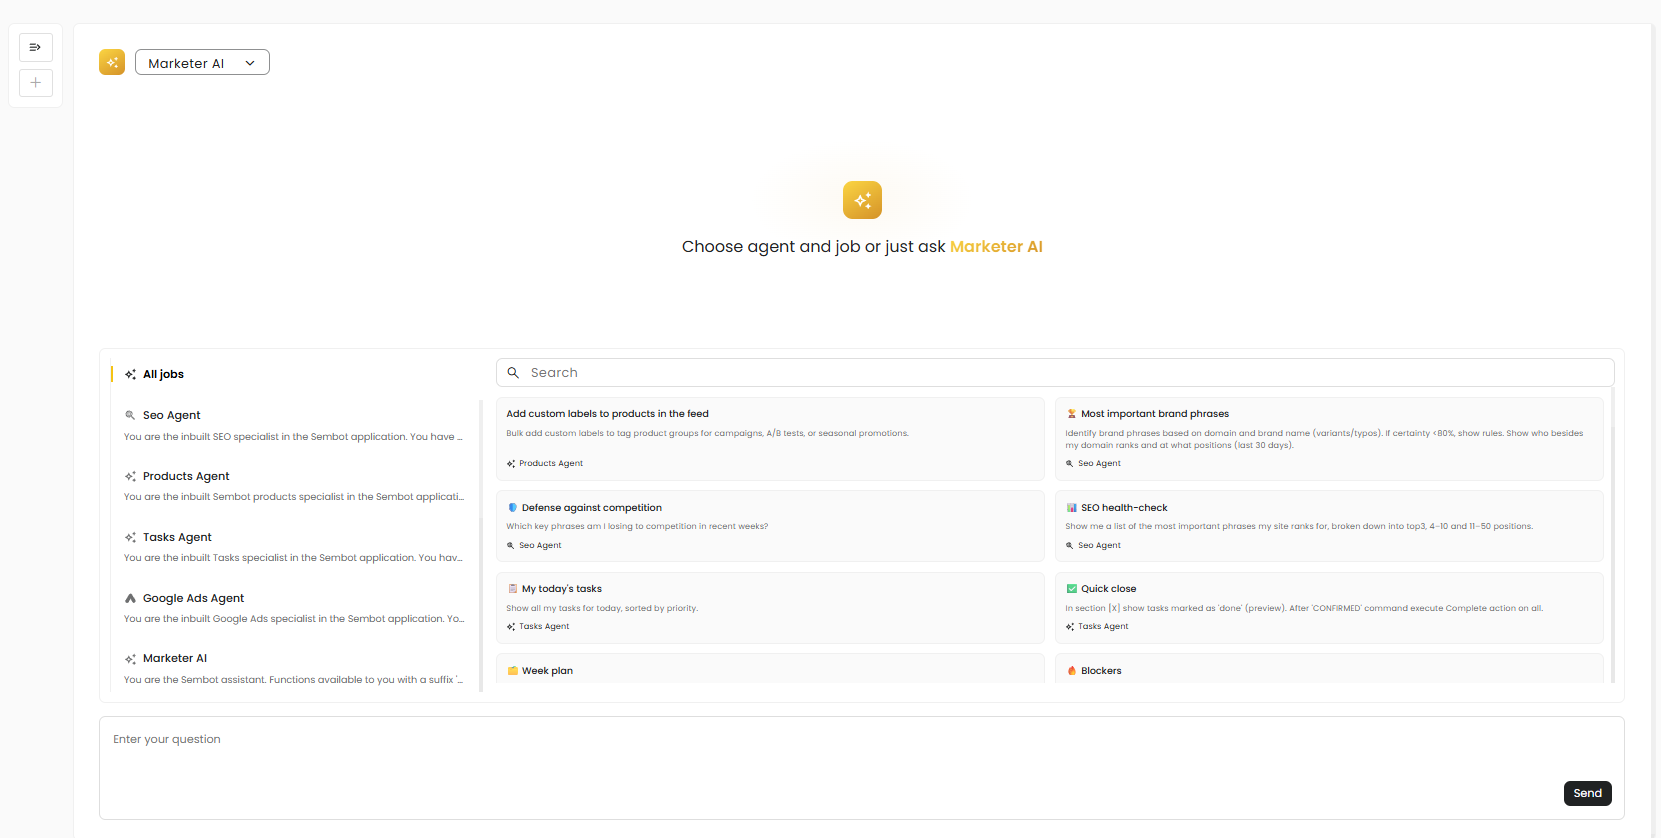
AI Marketer.
Report a bug.
Notifications icon.
Time tracking.
Tools.
Main panel: Marketer AI
Main panel: Report a bug
The Report a Bug section lets users quickly submit an issue directly from the app by providing their name, email address, and a short description of what happened. The report is sent to the team along with technical details, making it easier to diagnose and fix the problem.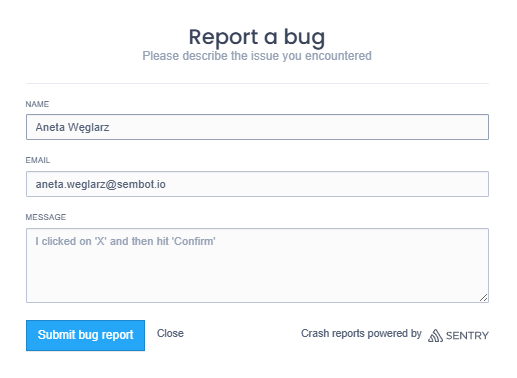
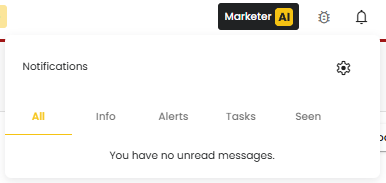
Main panel: Notification
The Notifications section provides quick access to preview and manage in-app messages, organized by category.
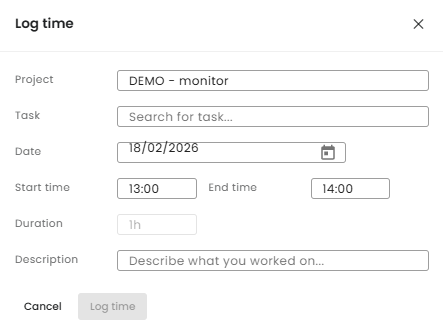
Main panel: Time Tracking
The Time Tracking section is used to record time worked on a selected project and task. Users can specify the date, start and end time (or total duration), and add a short description of the work completed.
Main panel: Tools
The Tools section provides quick access to the key account options: user settings, workspace settings, the time-tracking report, and log out.
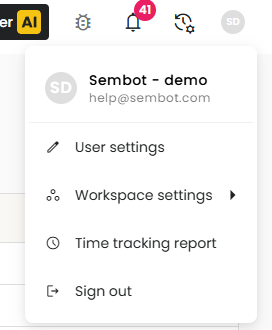
1, User settings relate to the account and personal preferences, such as profile details, language, password, and other individual settings.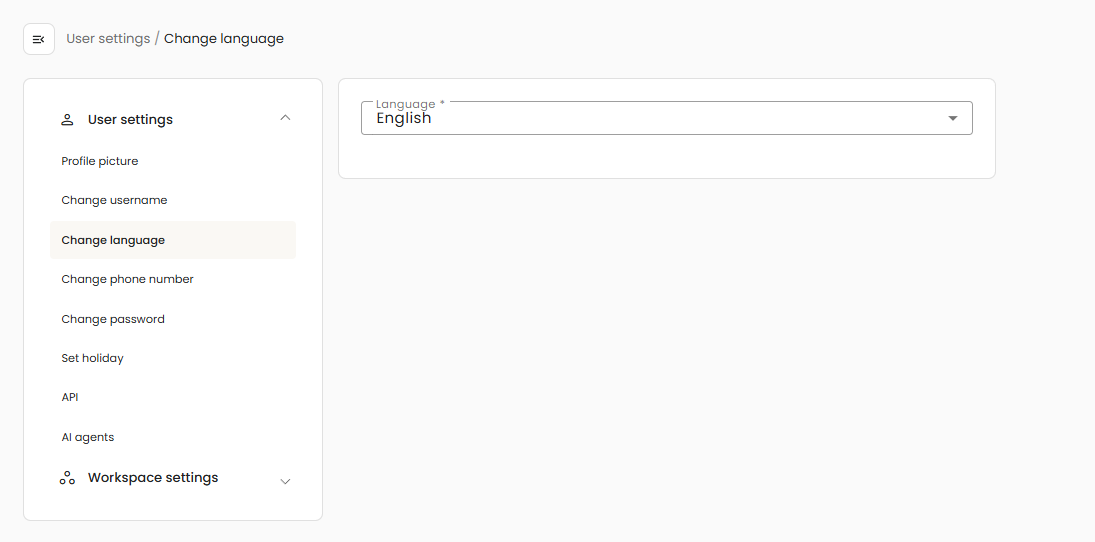

2. Workspace settings centralize the app configuration in one place and provide access to workspace-level setup.
Payments - access to invoices and active plan details, with the option to purchase, renew, or change the plan.
Users - a list of users who have access to the account.

Roles - defines each user’s role/permissions.

Teams - allows creating teams and assigning groups of users.

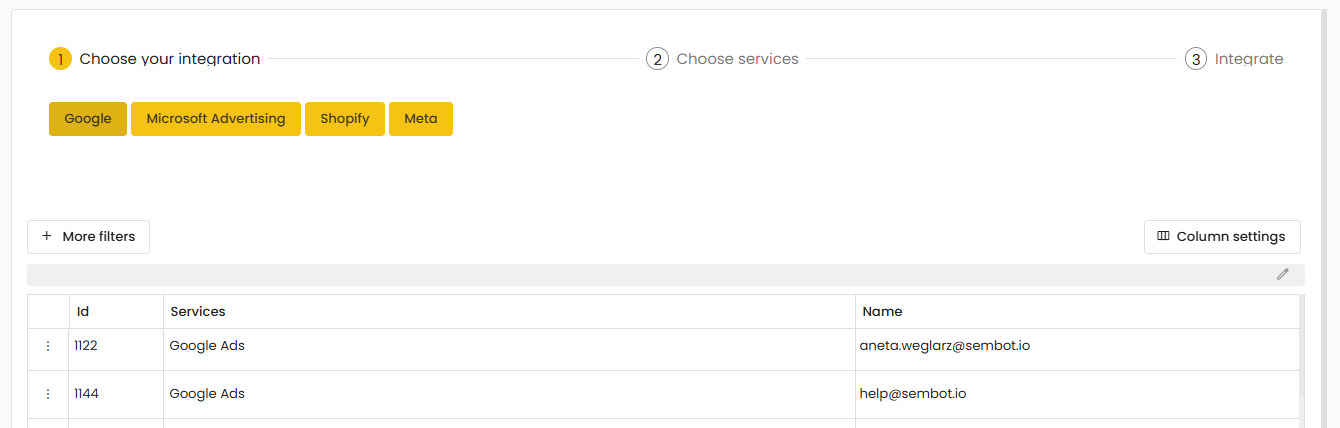
Connections - a list of integrations that can be used across projects.
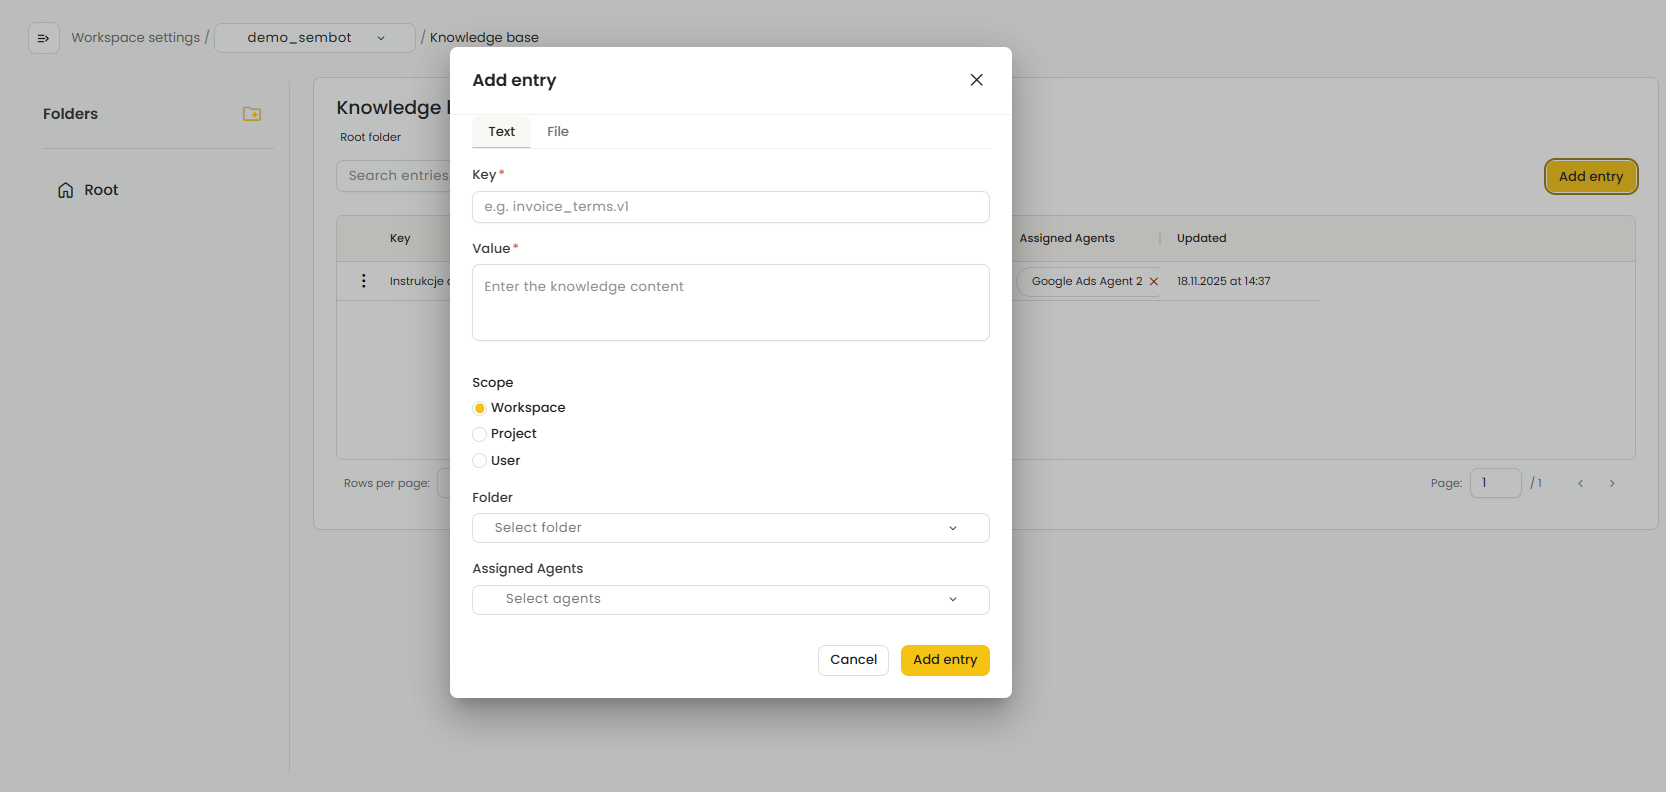
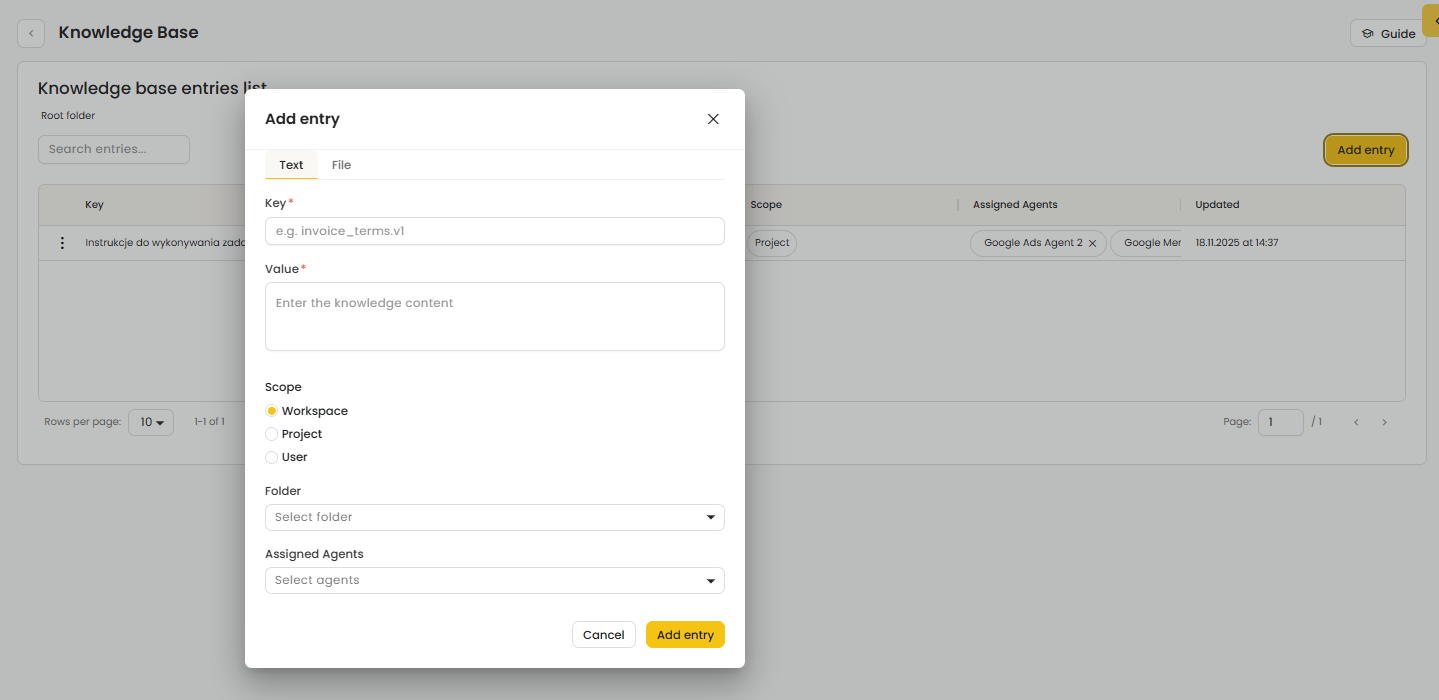
Knowledge base - a “backstage” area for Marketer AI, where context can be provided to help the system deliver accurate, tailored answers.
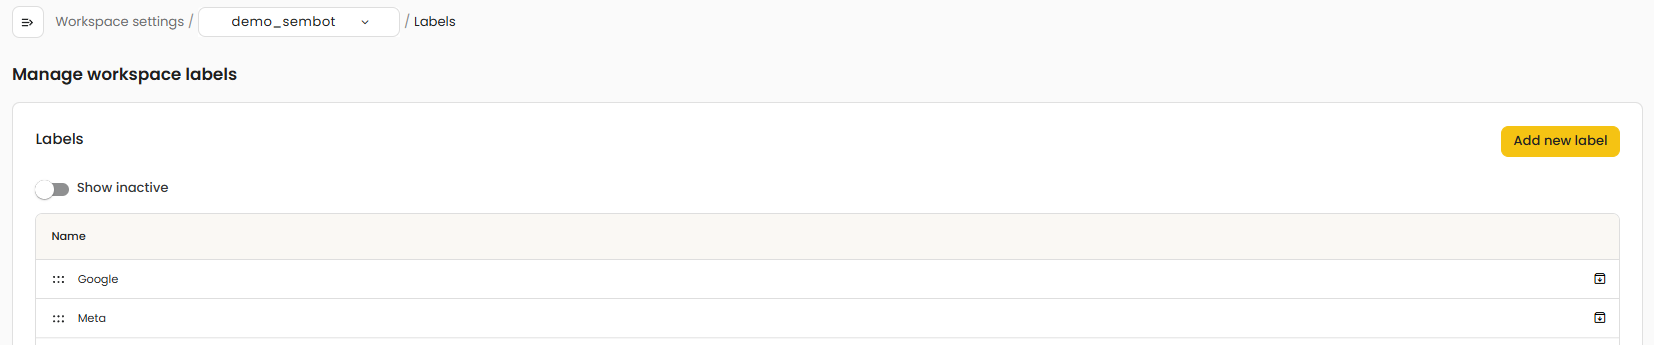
Labels - used to create and manage labels and categories (assigned to an agent) to organize data and make filtering and managing tasks and items easier.
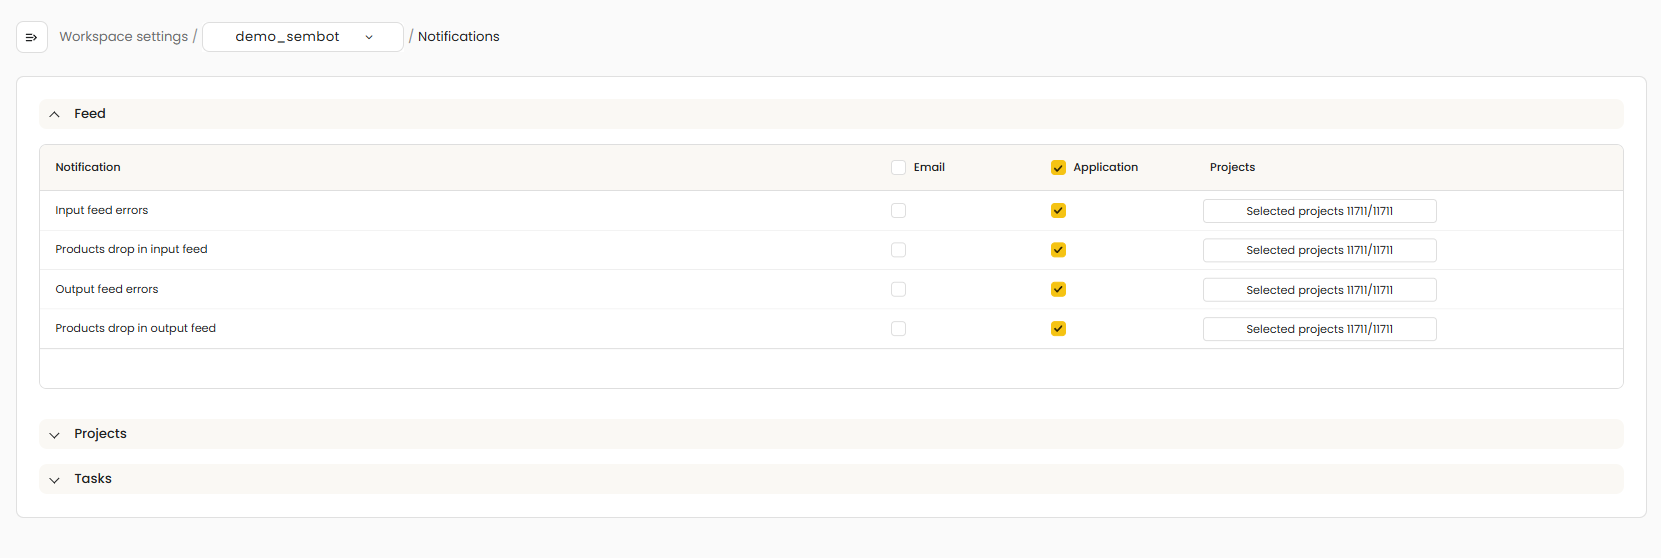
Notifications - configuration of in-app alerts, with the option to choose the delivery channel (email and/or in-app).
Comparators - a list of WL/keyword CSS comparison services available within the account.

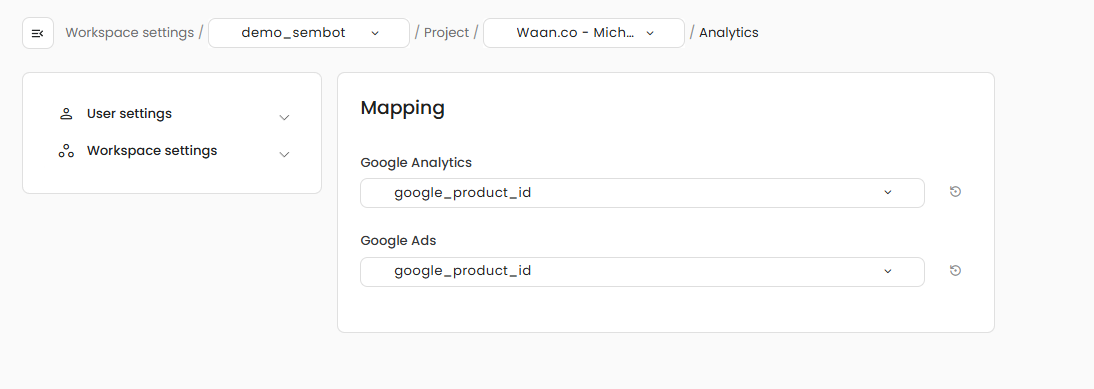
Project - project-level settings for configuring analytics data mapping.
3. Time-tracking report is used to review and settle/bill the time logged against tasks.
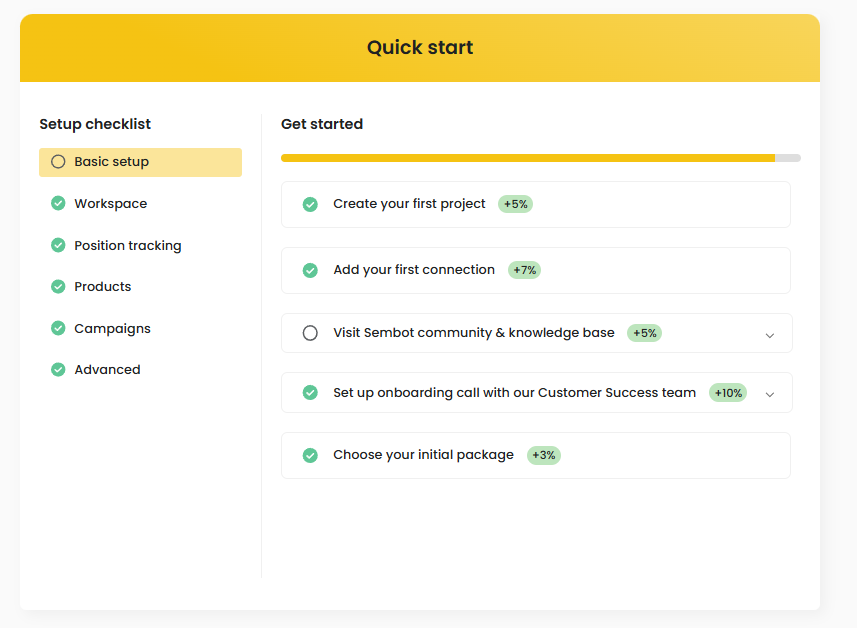
Sidebar: Quick Start
Quick Start is a setup guide that walks users step by step through the initial system configuration and shows onboarding progress.
Sidebar: AI Marketer
AI Marketer is a virtual marketing assistant designed to streamline and optimize everyday marketing work. Powered by advanced AI, it helps save time, make data-driven decisions, and plan, create, and execute marketing communications, content, and activities across multiple channels.
Sidebar: Dashboard
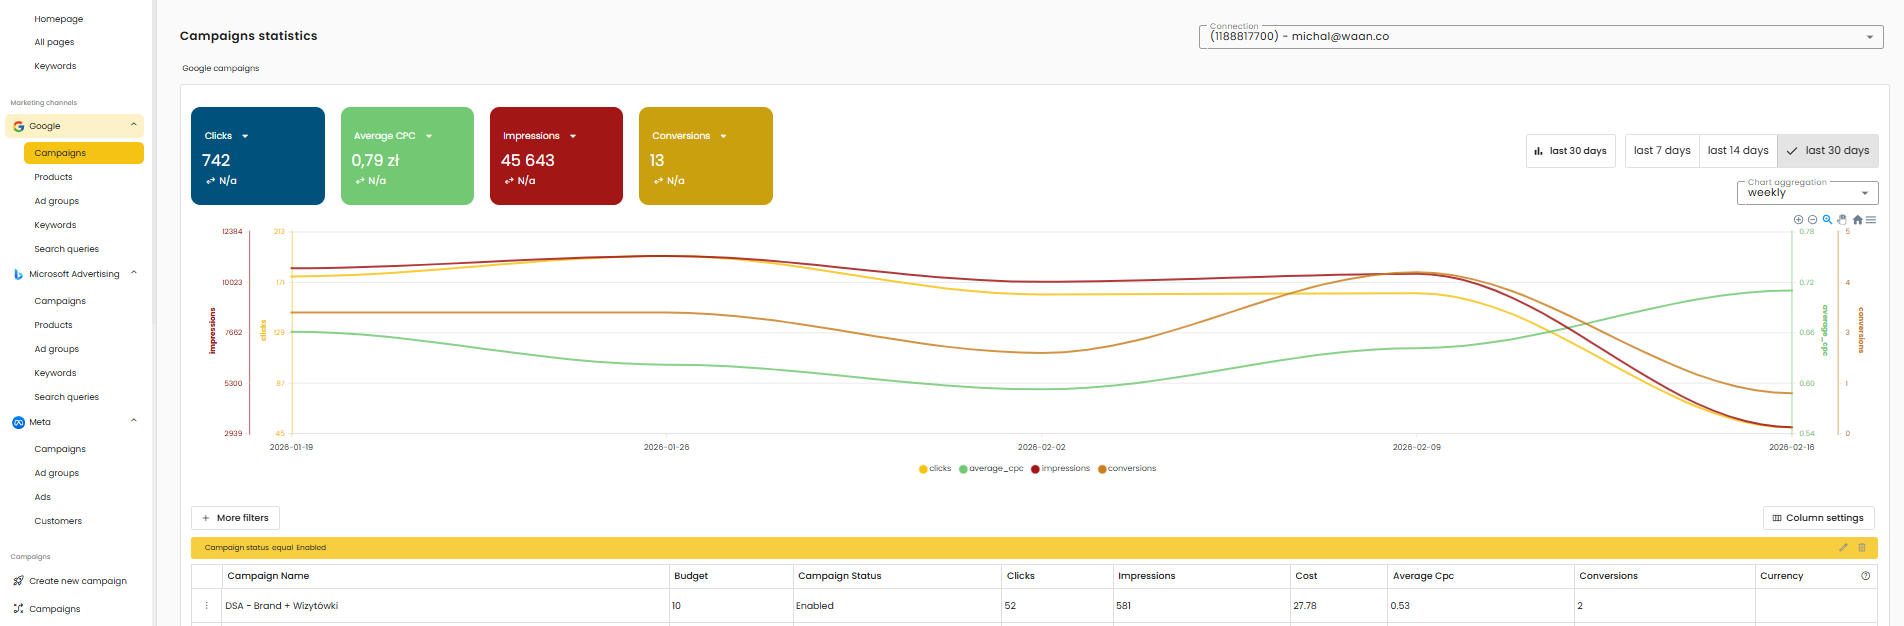
The Dashboard is a central hub that collects and displays data from all marketing channels where you run campaigns. It provides a complete view of your performance in one place, without switching between platforms.

Sidebar: My Tasks
My Tasks is a list of all tasks assigned to you, making it easy to track and manage your responsibilities.

Sidebar: Summaries
The Summaries module lets you generate reports based on data from previously configured dashboards, for a selected time period and channels (e.g., Google Ads, Meta Ads, Microsoft Ads). Reports can be sent on a recurring schedule via email, with options to customize the email content and approve the report before sending (data verification, adding comments and conclusions).

Sidebar: Tasks
Task list |
The Tasks module is used to manage and monitor tasks in the app. It includes views for My Tasks (assigned to me), Project Tasks (linked to specific projects), and All Tasks available within the account—helping you stay on top of progress and priorities.

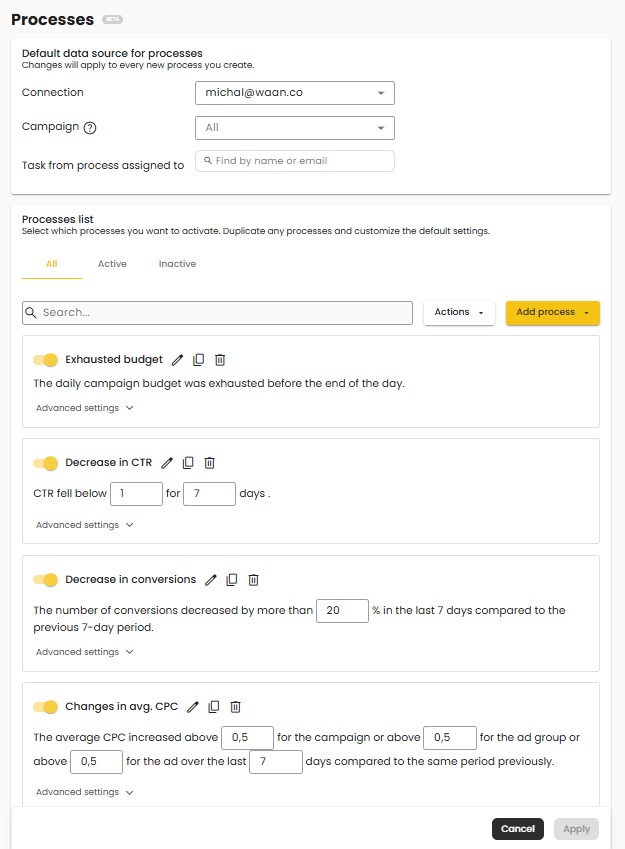
Sidebar: Automation processes
Processes |
The Processes module is where you define and run automated processes that monitor events across connected accounts. The system detects important events and automatically creates the relevant tasks, assigned to designated users.
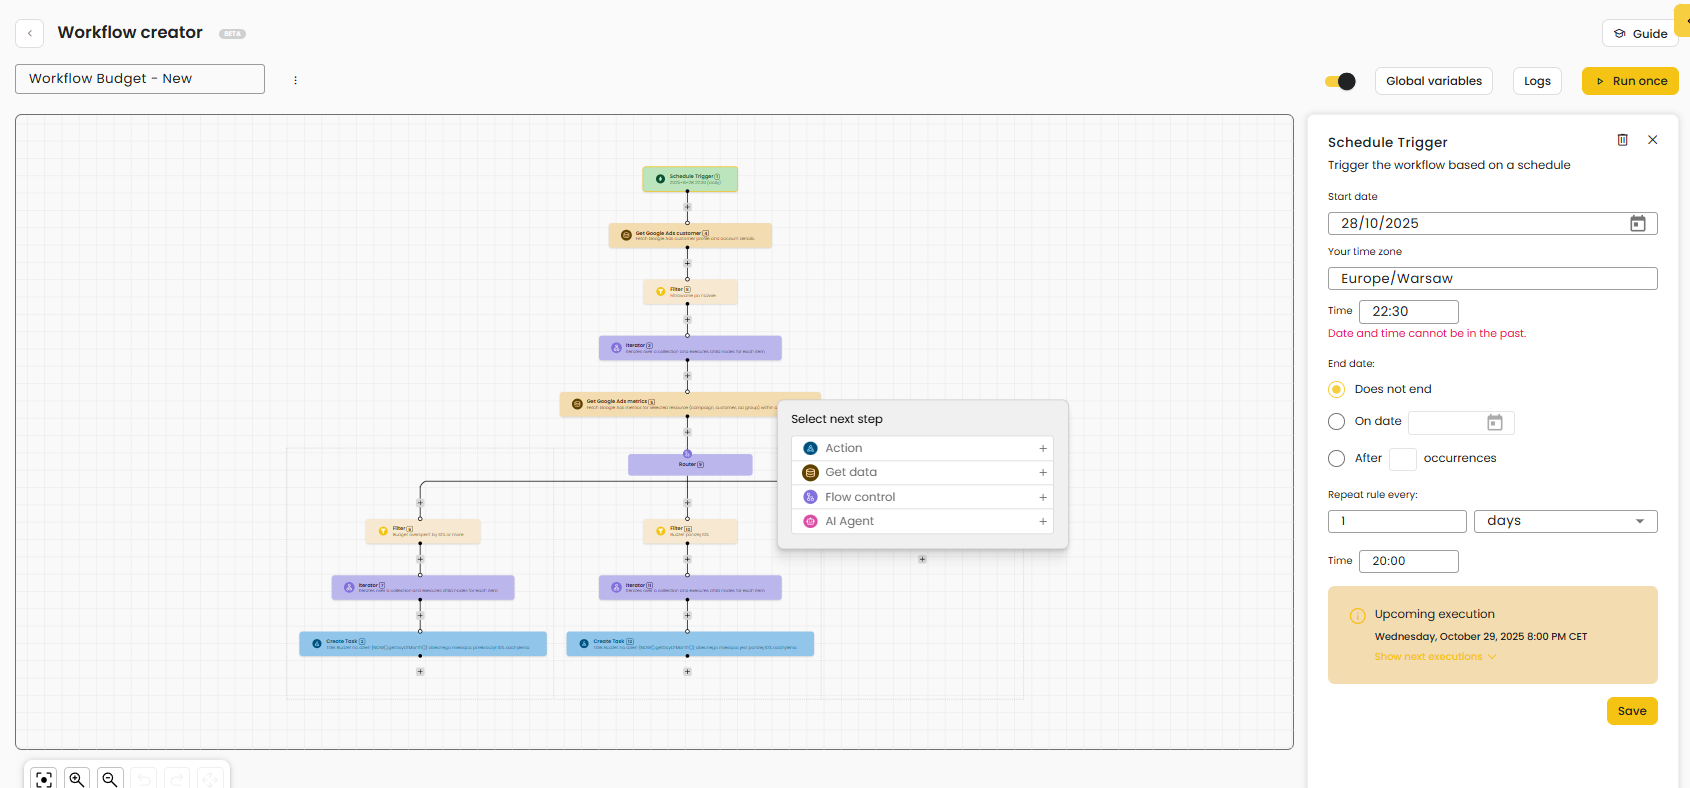
Workflows |
The Workflows module lets users build automated verification and response paths based on data from integrations and other modules. It works as a no-code visual builder where you assemble a process from steps (blocks) to create custom rules and logic.
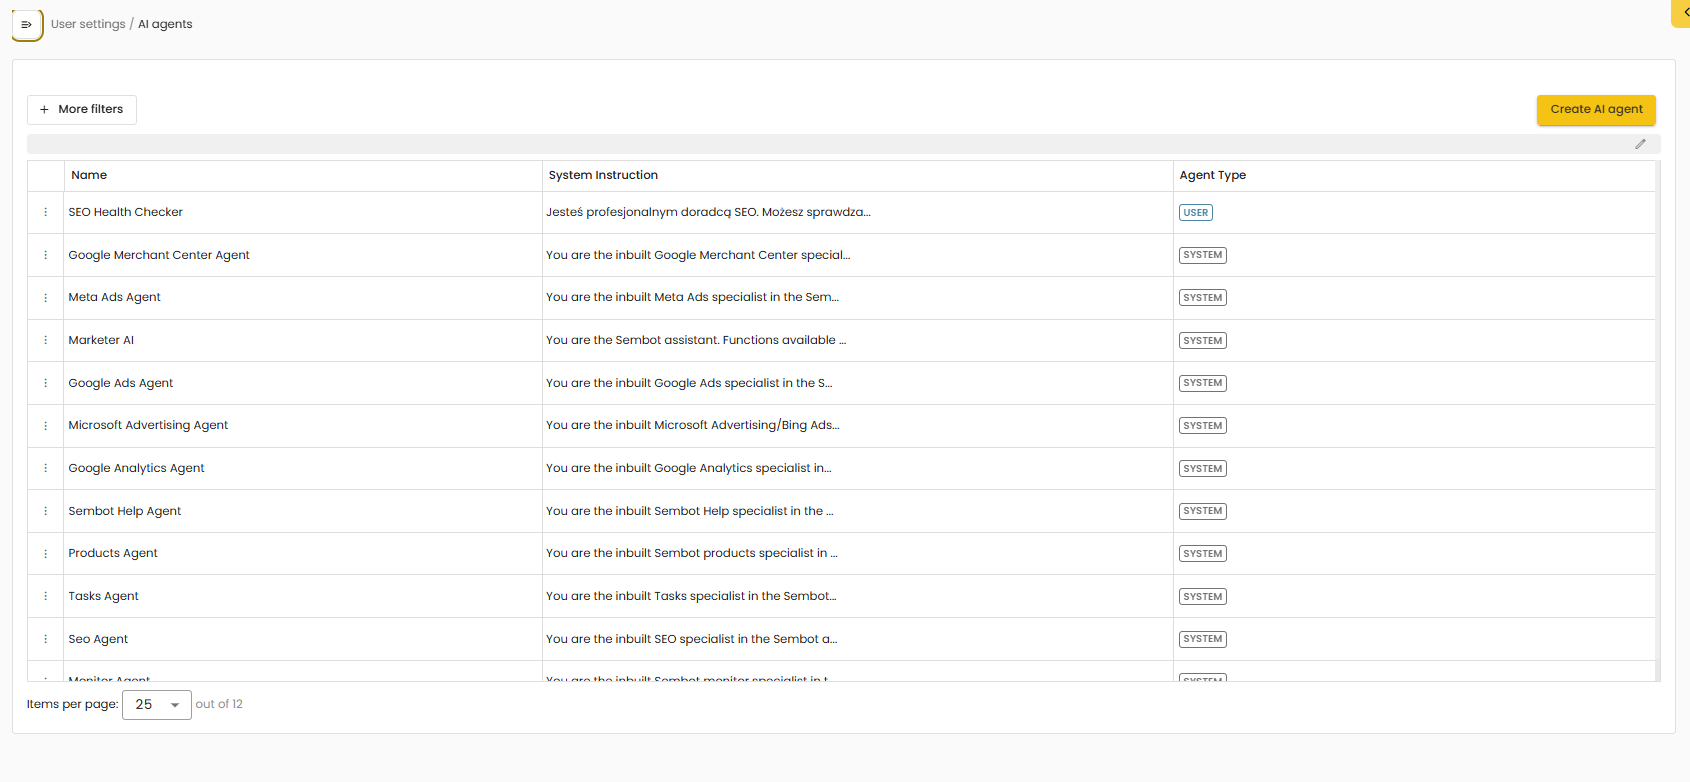
AI Agent list |
In AI Agents, you’ll find a ready-made list of built-in agents that support day-to-day online marketing work. Each agent specializes in a different area (e.g., advertising campaigns, SEO, analytics). You can also create your own agent tailored to your company or project needs (specific platforms, campaign types, reporting processes, or communication style).
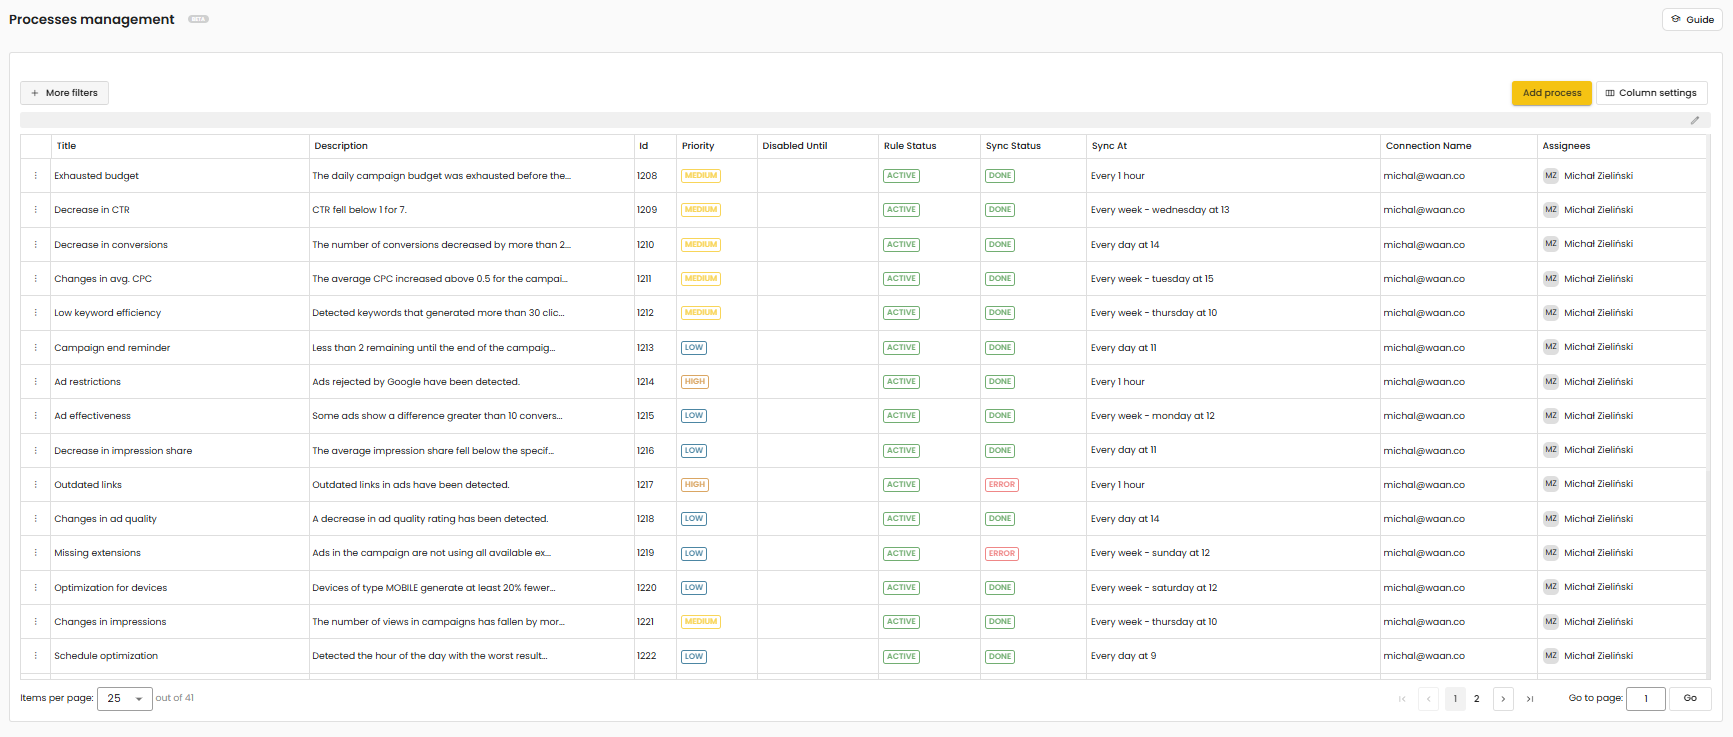
Processes list |
The Process List tab is the management center for all running processes. It gives you full control over active processes, including editing, managing status, and creating copies for further optimization.
Knowledge base |
The Knowledge Base module acts as the “backstage” for AI Marketer a space where users can provide the context the system needs to deliver accurate, relevant, and tailored answers.
Sidebar: Inventory
Products |
1. Your products - here you can find information about your products. It is also main subpage where you will do operations on products to optimize output product feed
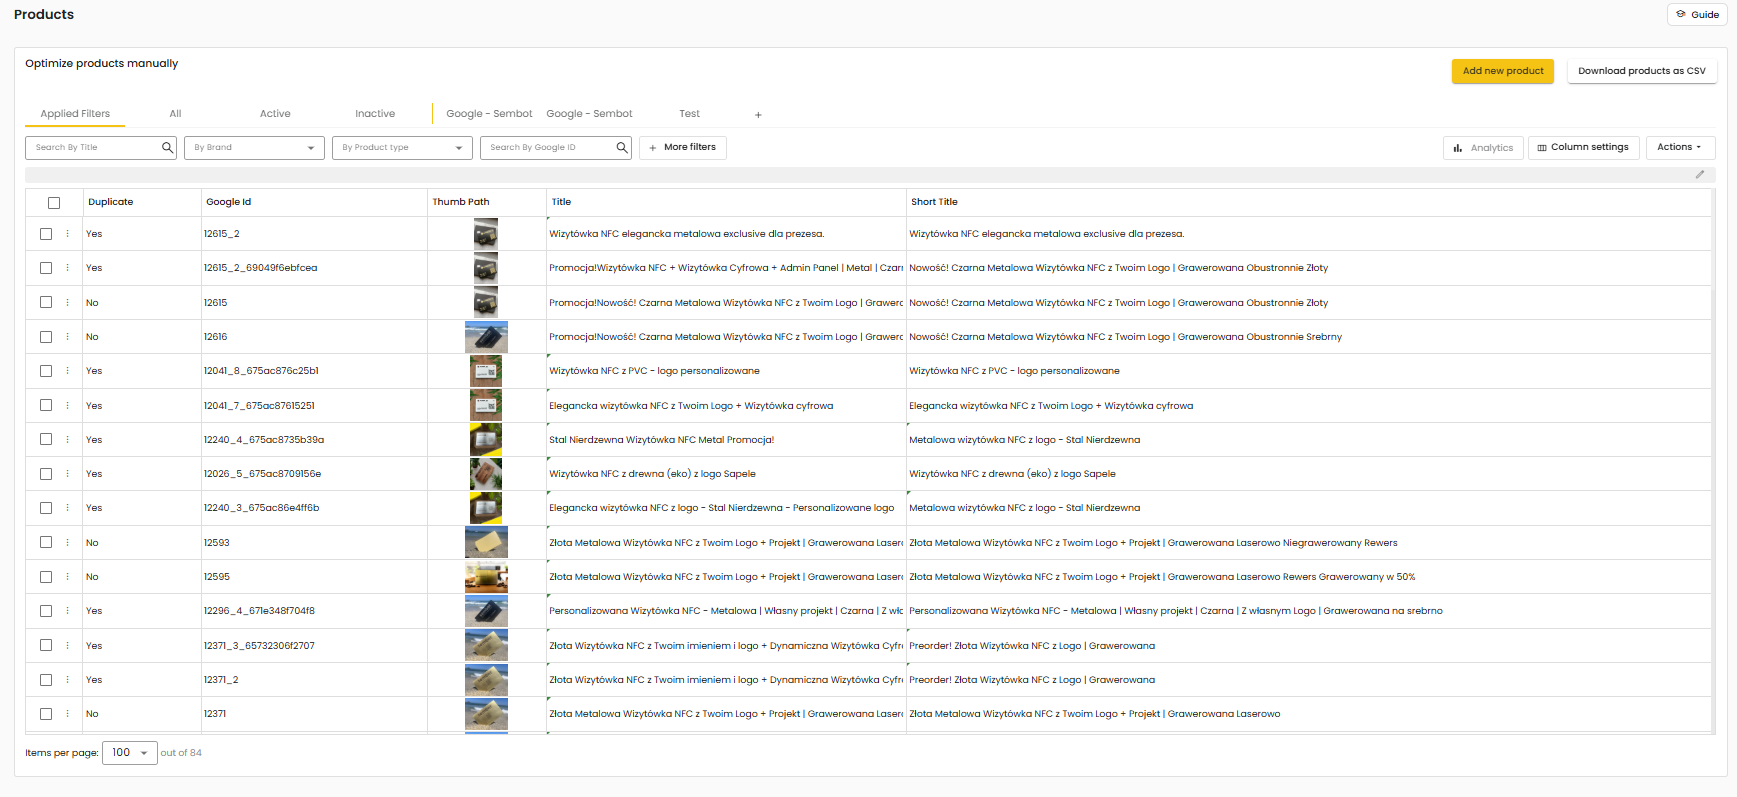
Access to all products, active, inactive, and preview of created output feeds.
Quick search by product title.
Quick search by Brand attribute.
Quick search by Product type attribute.
Quick search by Google ID attribute.
The "More Filters" function is used to quickly find products based on attributes, such as when a desired attribute is empty.
Analytics allows you to fetch analytical data from Google Ads and Google Analytics panels.
Column settings allow you to customize the visibility of columns in the product table.
The "Actions" tab provides functionalities such as:
Create rule: make changes to the found products, which can be considered as a form of "editing" products.
Remove old products: Sembot's mechanism permanently keeps the products it has downloaded. If a product is not present in the new feed, it will no longer appear in the output file but will not be deleted from the Sembot panel. However, if we are certain that a particular product will no longer appear and we don't want to keep it in the downloaded resources, we can use the function to delete old products. Depending on the quantity, this process may take a while.
Remove override: Each field in our panel can be manually overwritten, and such a value will always be included in the output file regardless of other settings. This function allows you to quickly remove such overrides.
Get phrases: involves fetching the phrases that have led to conversions for each product. You will then be able to include selected phrases in the description. The phrase retrieval process will run in the background and take a few minutes.
2. Categories - are based on the product_type attribute. They can be used to create DSA campaigns targeting specific categories. In order to generate a DSA Category campaign, you need to manually fill in the URLs and keywords detected by the category system.

3. Brands - can be used to configure DSA Brand campaigns. They are automatically fetched from the input feed. You can supplement them in the Products tab. In order to generate a DSA Brand campaign, you need to manually fill in the URL column and keywords.

Rule settings |
Here you can create rules that will be applied continuously. This means that even if there are new products for which the criteria are met, the rule will also be applied to them.

IMPORTANT: The rules are dependent. This means that the result of a rule can be used in the filter of next rule.
| Feed |
Here we add product files to our project, add our project to comparison websites and also here we will find a link to our output file generated by Sembot.
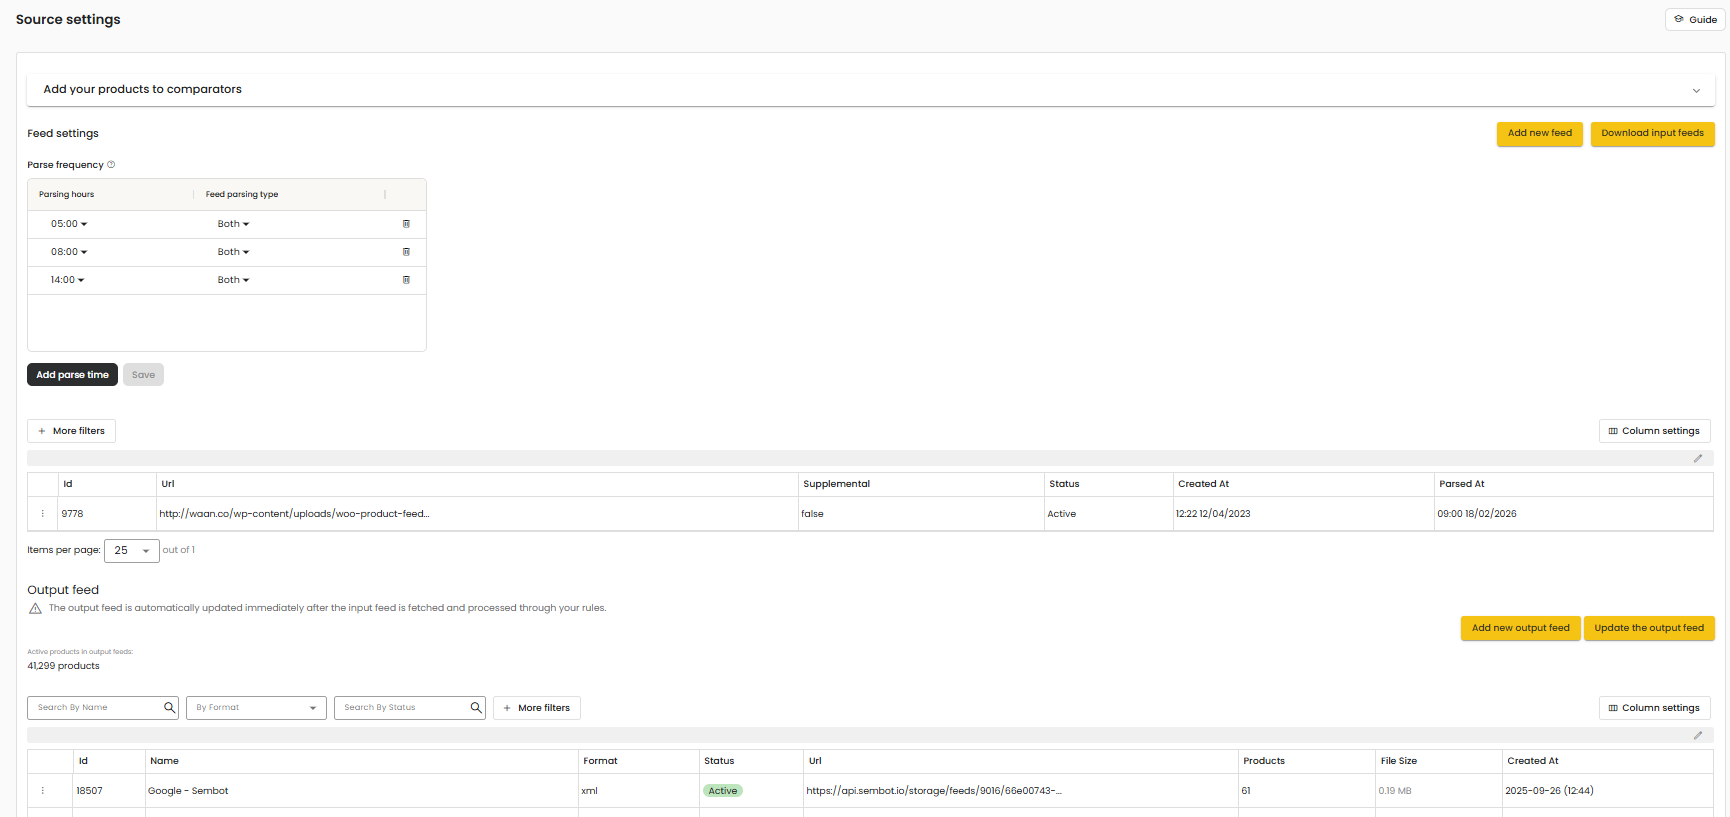
Add products to price comparison engines - here we add our products to a dedicated website of a given price comparison shopping service. The default, available to everyone, is our sembot.eu comparison shopping service website, but you can also have your own or several of yours as part of the White Label / Brand CSS services. To learn more, click the Add Comparator button in the Comparators section at the top of the page
Feed settings - Here we add a link to our product feed file. Supported formats are xml, csv, tsv, gzip, and Google Sheets (public only). We can also change settings such as the parsing time, custom name of a given feed, file type (there is also an auto-detection option) or a separator and value discriminator in the case of .csv files. There is also a Download input feeds button in the main window - it allows you to manually download products at the moment.
Output feed - here you will find links to the output feeds you have created. They take into account any changes made using the Sembot application. It is this link that you use in your ad panel instead of the source link.
Sidebar: Marketing channels
The Marketing Channels module organizes data and activities by advertising source, providing quick access to the most important areas within each channel. It allows users to switch between platforms (e.g., Google, Microsoft Advertising, Meta).
Sidebar: Campaigns
Create new campaign |
Create new ad campaigns based on your marketing objectives. Requires active integration with an Ads account. Generated campaigns appear in the Ads account as paused, ready for activation.

Strategies |
Review all created strategies, monitor performance, and make adjustments to achieve marketing goals.
Asset library |
Upload and manage assets like images and videos for use in Performance Max campaigns. Ensure the library is populated before starting a campaign.

Sidebar: Monitoring
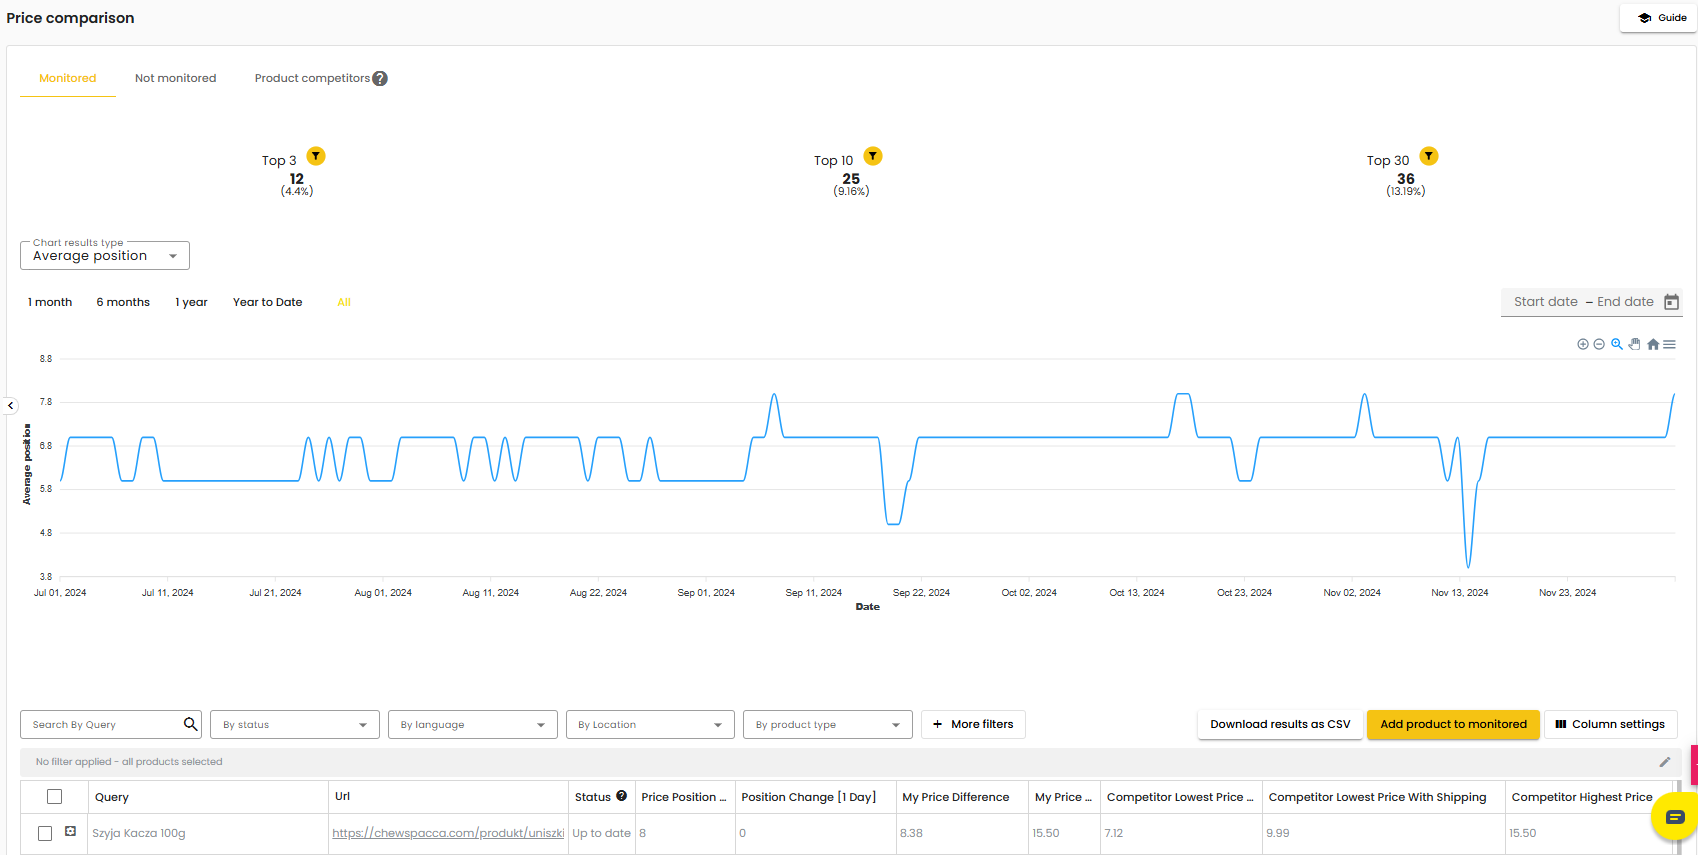
Price Tracking |
Position Tracking |
1. Organic Results - You can track the position of specific phrases in organic search results. Additionally, you can input generic phrases and evaluate their performance.

2. Product Ads - Monitor the positions of your products as they appear in advertisements

3. Text Ads - Assess the effectiveness of your text ads and track the position of phrases in text ad results.
Sidebar: Integrations
Connections |
To access product data from analytics channels, use the campaign generator, and leverage other integrations, you need to establish project connections with the appropriate channels.

In the top panel, you can select a connection type previously configured in the "Connections" section of your account settings (accessible via the gear icon in the top-right corner) or go directly to the configuration page.
The lower section displays a list of linked accounts you’ve successfully connected.
Comparators |
List of all comparison shopping engines we have access to within a given account

By clicking on a given comparison engine you will go to the list of projects in a given comparison engine, a bit different than the one known from "Projects list". You can also see the so-called external projects, not added from your account level. This is normal and in case of doubt please contact us
Under the "Add Comparator" button you will find information on how to get your own comparison shopping service
TOKEN is a technical symbol of a given comparison engine in our system.
Sidebar: Quality control
Visibility audit |
Conduct a free audit of your store. You will find data on the effectiveness of text ads, product ads and organic results. Also monitored are data on pricing and competition.


Sidebar: Projects
All projects |

Was this article helpful?
That’s Great!
Thank you for your feedback
Sorry! We couldn't be helpful
Thank you for your feedback
Feedback sent
We appreciate your effort and will try to fix the article